4.Web开发进阶.pptx
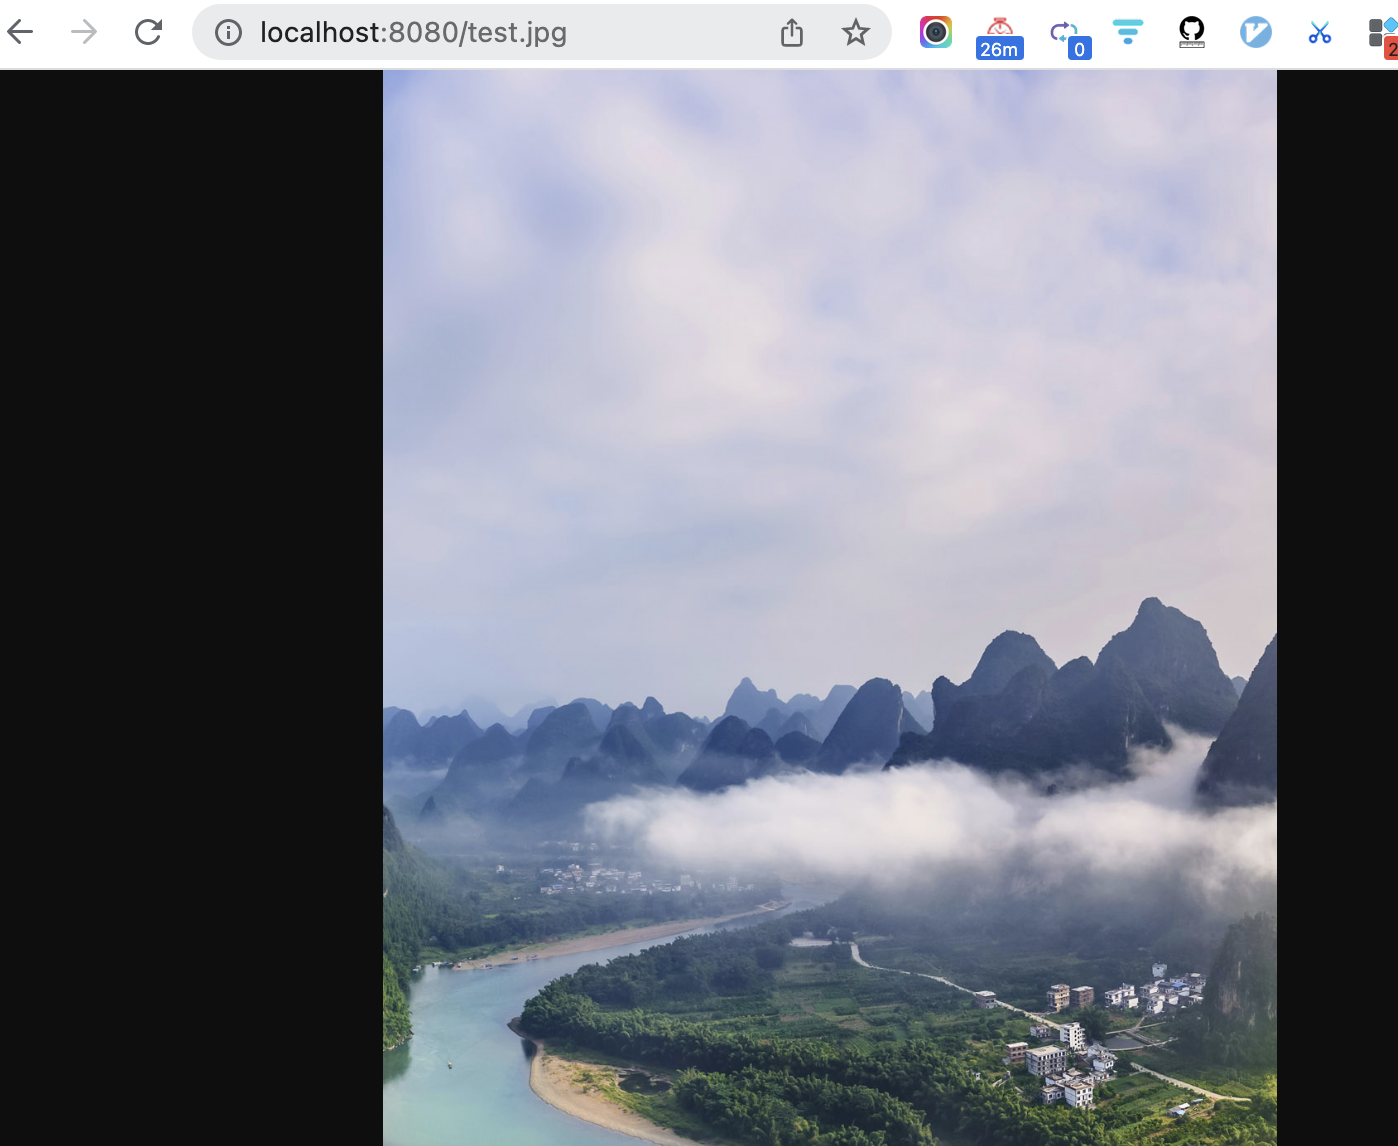
静态资源访问
默认将静态资源放到src/main/resources/static目录下,这种情况直接通过ip:port/静态资源名称即可访问(默认做了映射)

也可以在application.properties中通过spring.web.resources.static-locations进行设置
例如,spring.web.resources.static-locations=/images/**,则必须在原路径前加上images
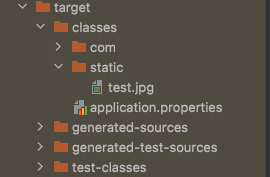
编译后resources下面的文件,都会放到target/classes下
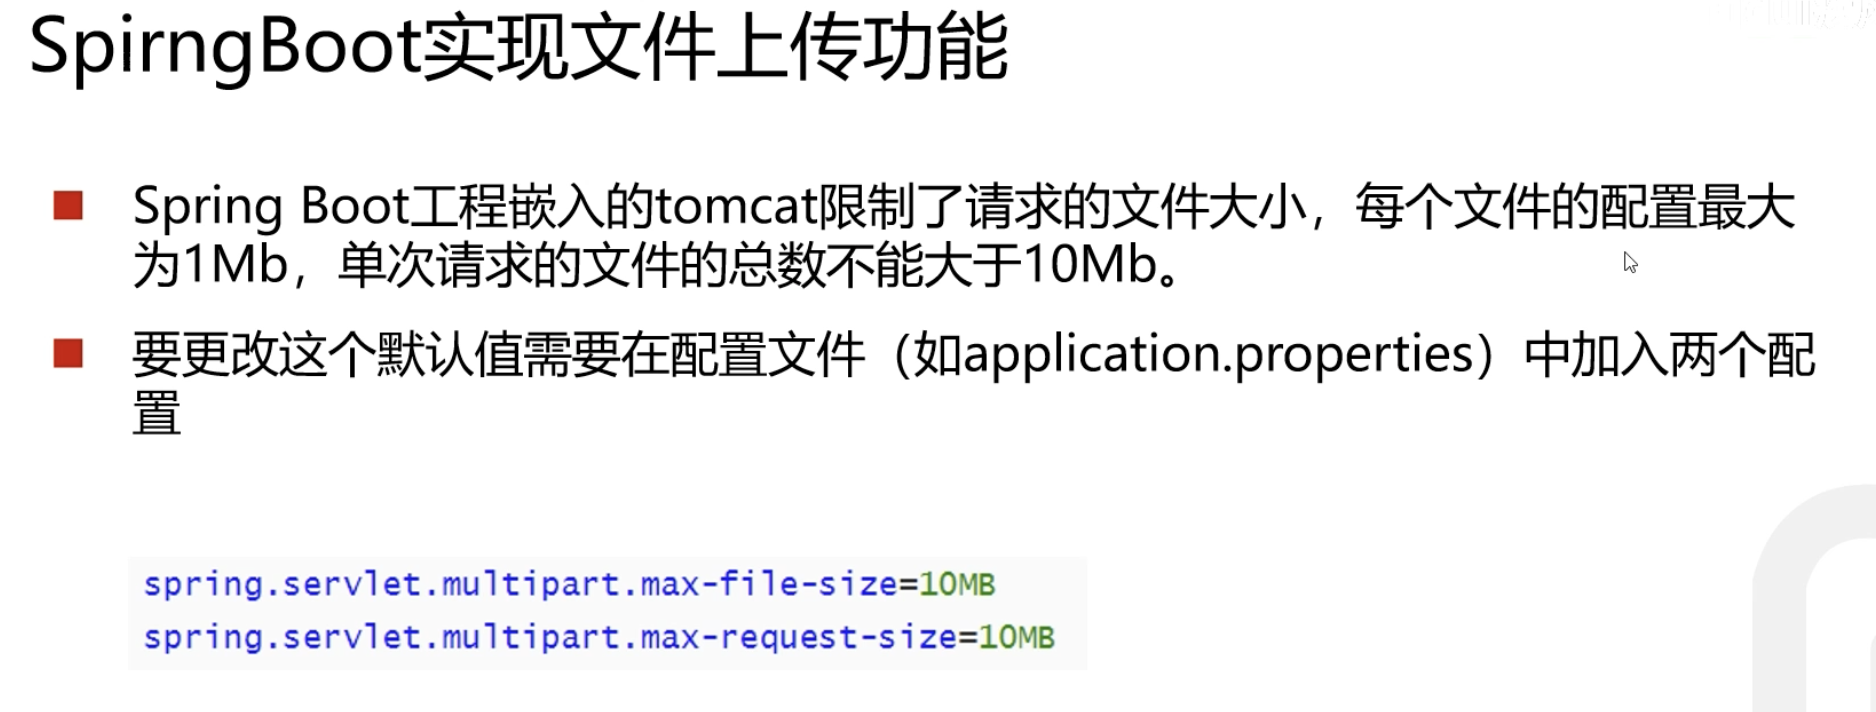
文件上传
传文件时,(对前端来说)表单的enctype属性,必须由默认的application/x-www-form-urlencoded,改为multipart/form-data,这样编码方式就会变化
spring.servlet.multipart.max-file-size=10MB
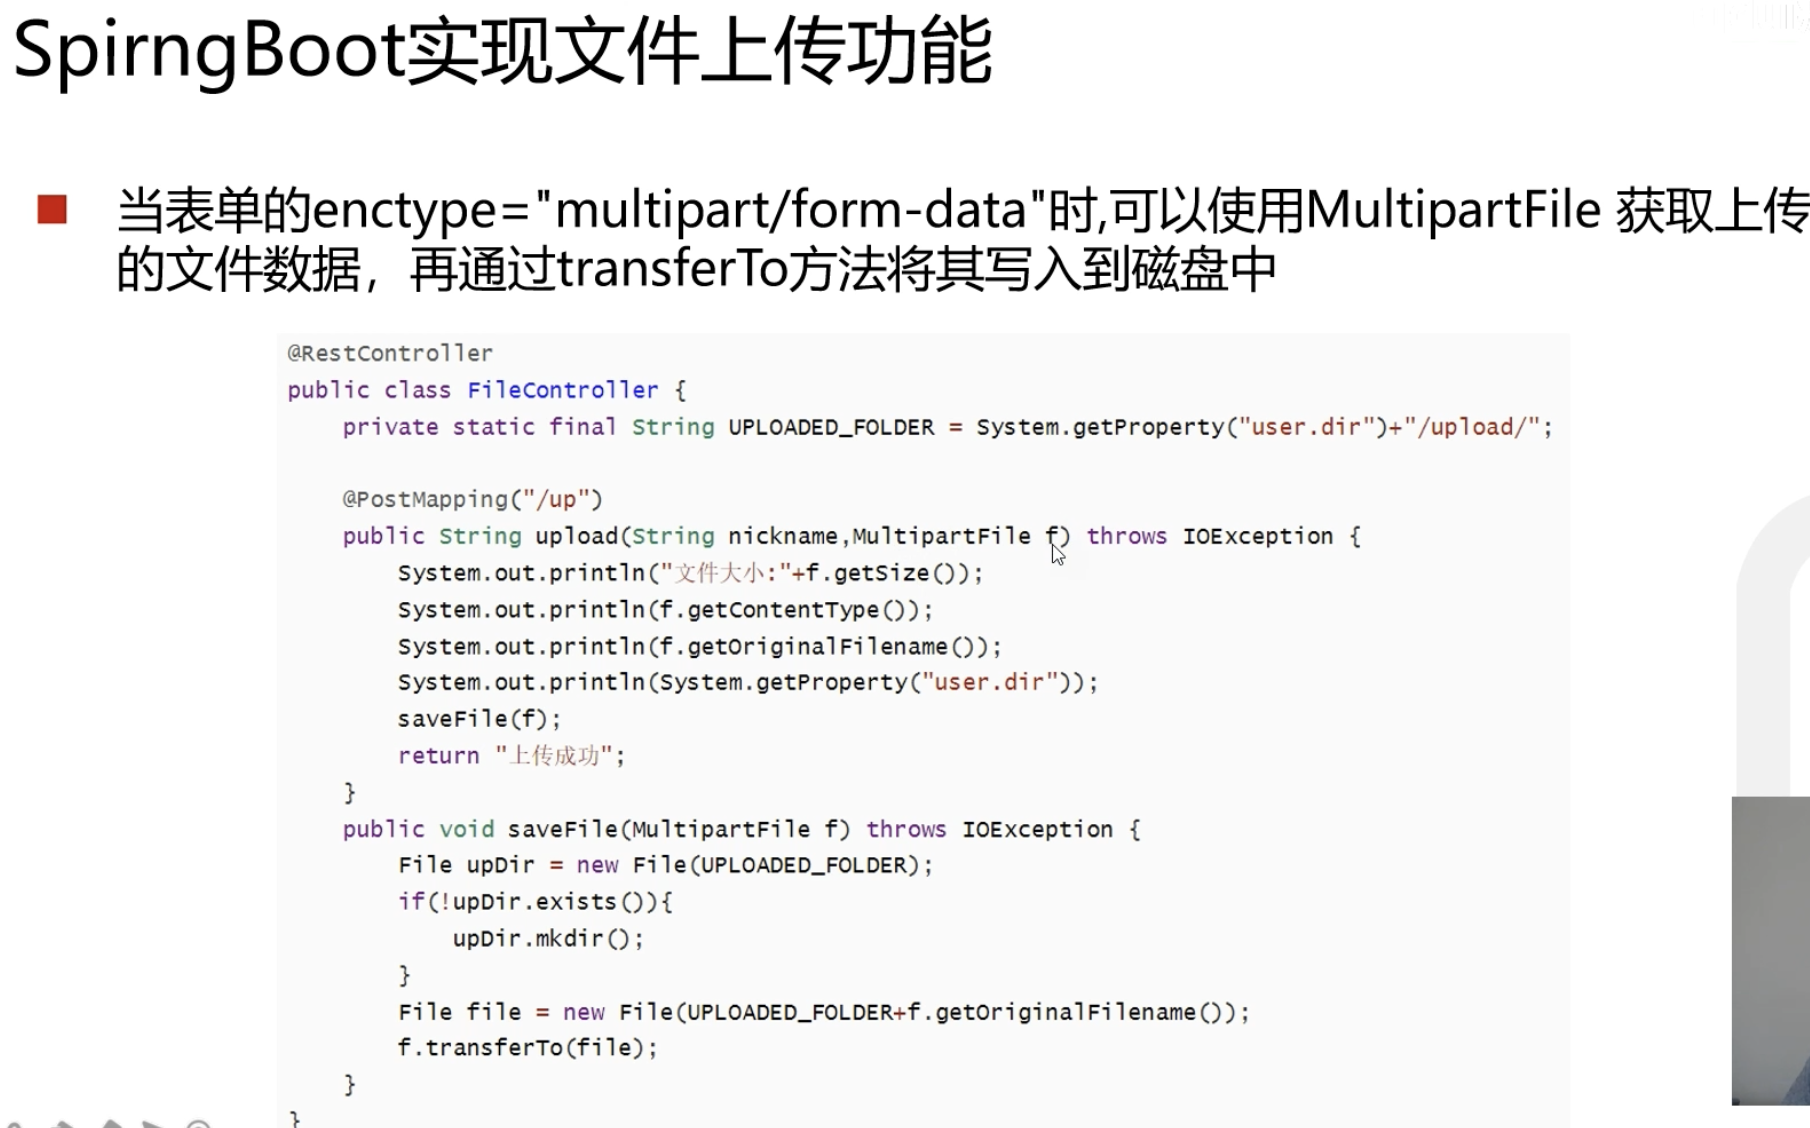
src/main/java/com/example/helloworld/controller/FileUploadController.java
1
2
3
4
5
6
7
8
9
10
11
12
13
14
15
16
17
18
19
20
21
22
23
24
25
26
27
28
29
30
31
32
33
34
35
36
37
38
39
40
41
42
43
44
45
46
|
package com.example.helloworld.controller;
import org.springframework.web.bind.annotation.*;
import org.springframework.web.multipart.MultipartFile;
import javax.servlet.http.HttpServletRequest;
import java.io.File;
import java.io.IOException;
import java.util.Date;
@RestController
public class FileUploadController {
@PostMapping("/upload")
public String up(String nickname, MultipartFile photo, HttpServletRequest request) throws IOException {
System.out.println(nickname);
System.out.println(photo.getOriginalFilename());
System.out.println(photo.getContentType());
String path = request.getServletContext().getRealPath("/upload/");
System.out.println(path);
saveFile(photo, path);
return "上传成功";
}
public void saveFile(MultipartFile photo, String path) throws IOException {
File dir = new File(path);
if (!dir.exists()) {
dir.mkdir();
}
File file = new File(path + photo.getOriginalFilename());
photo.transferTo(file);
}
}
|


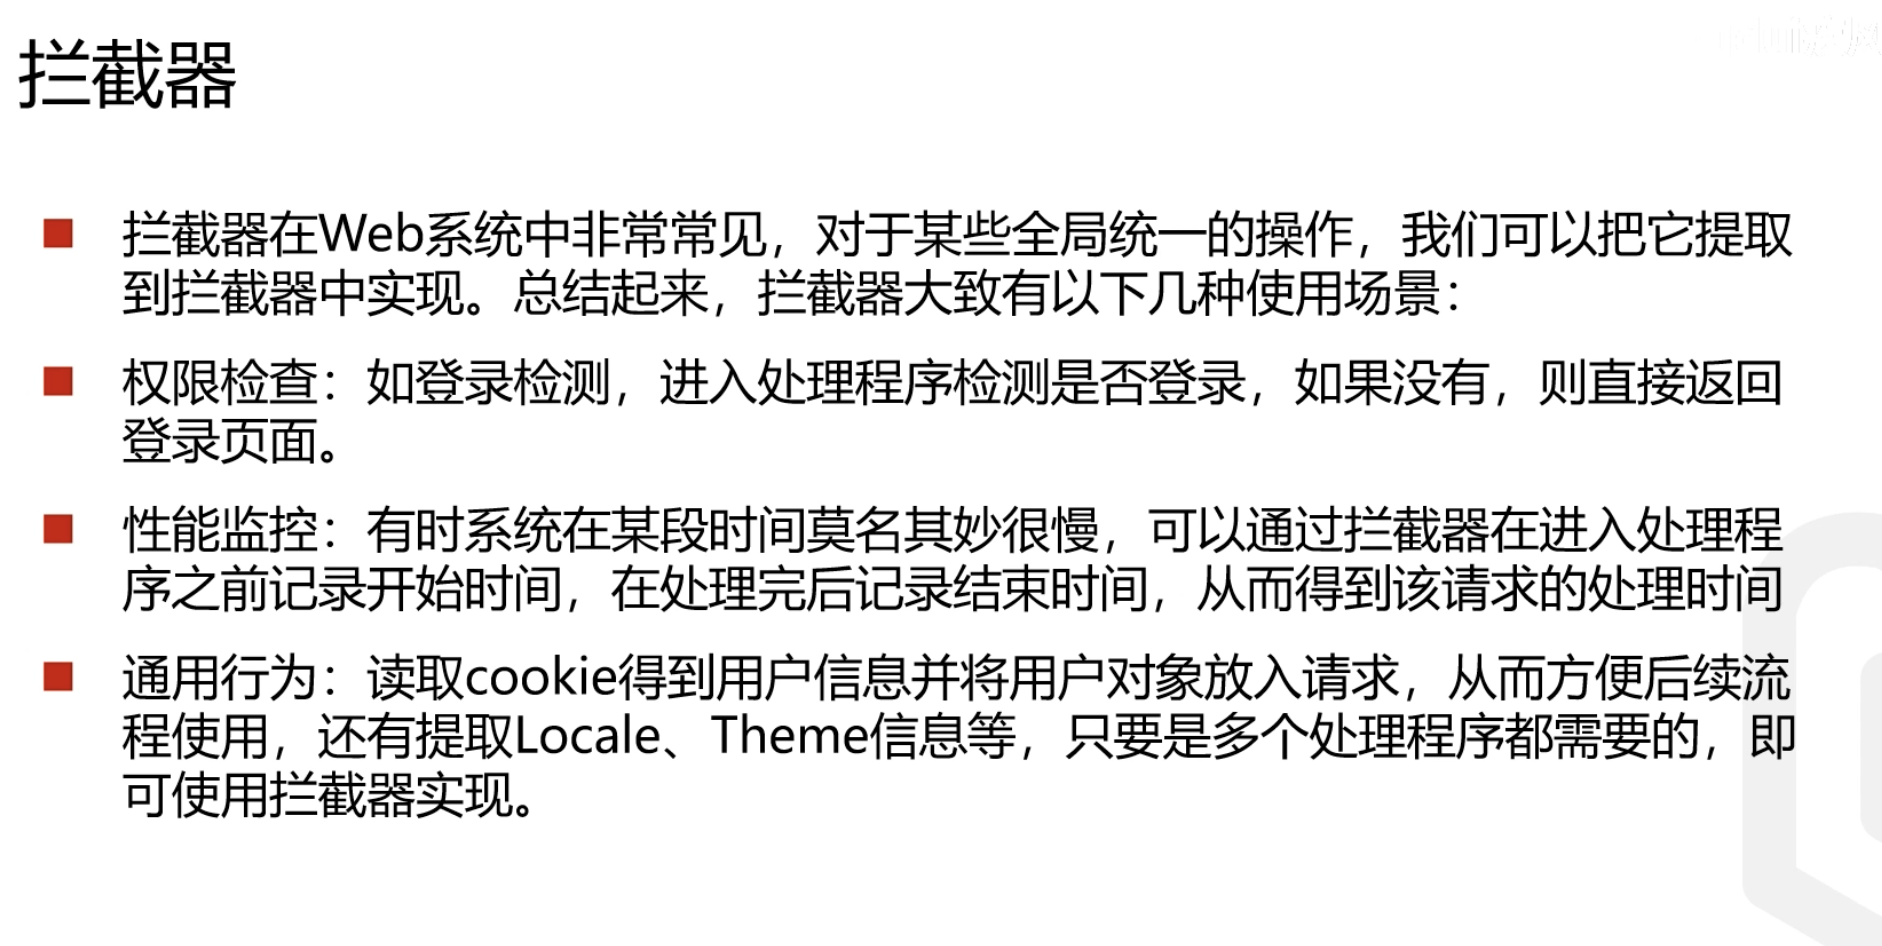
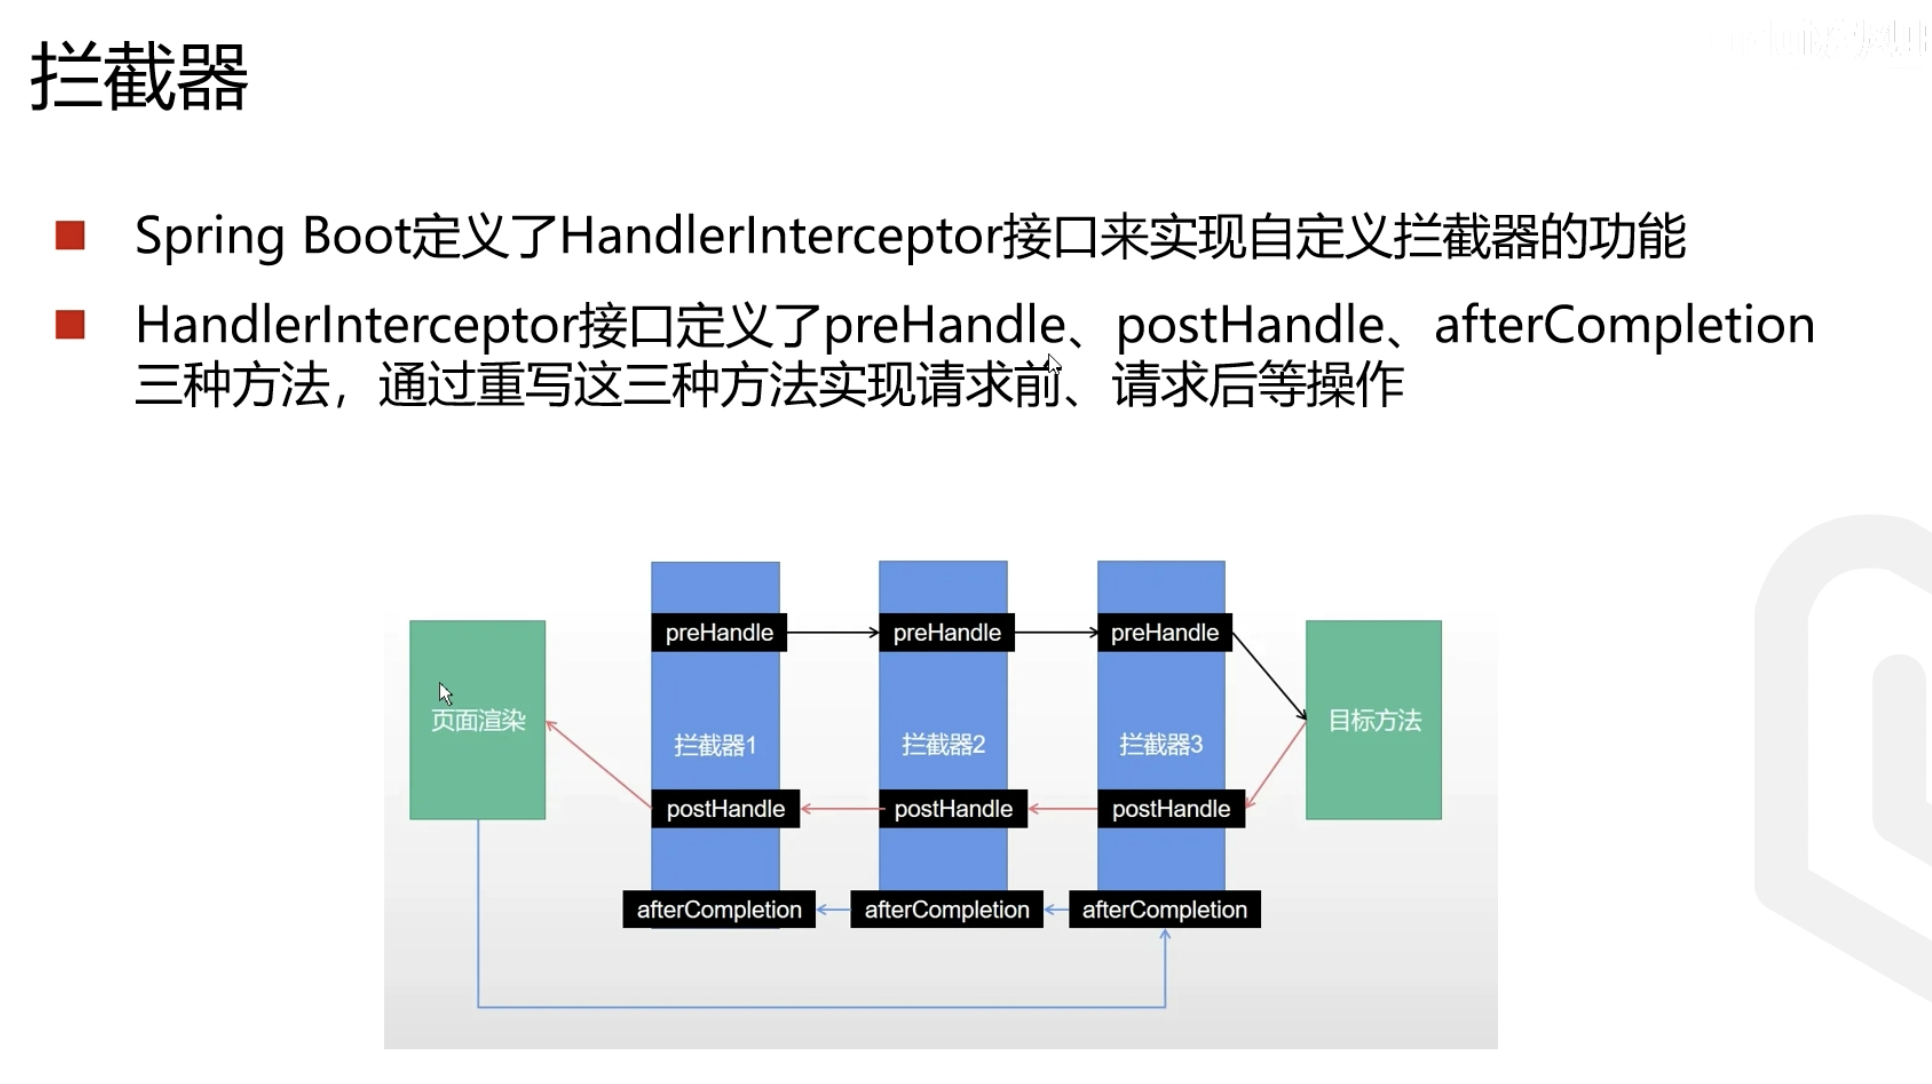
拦截器
这不就是中间件么..
和gin的middleware完全一样
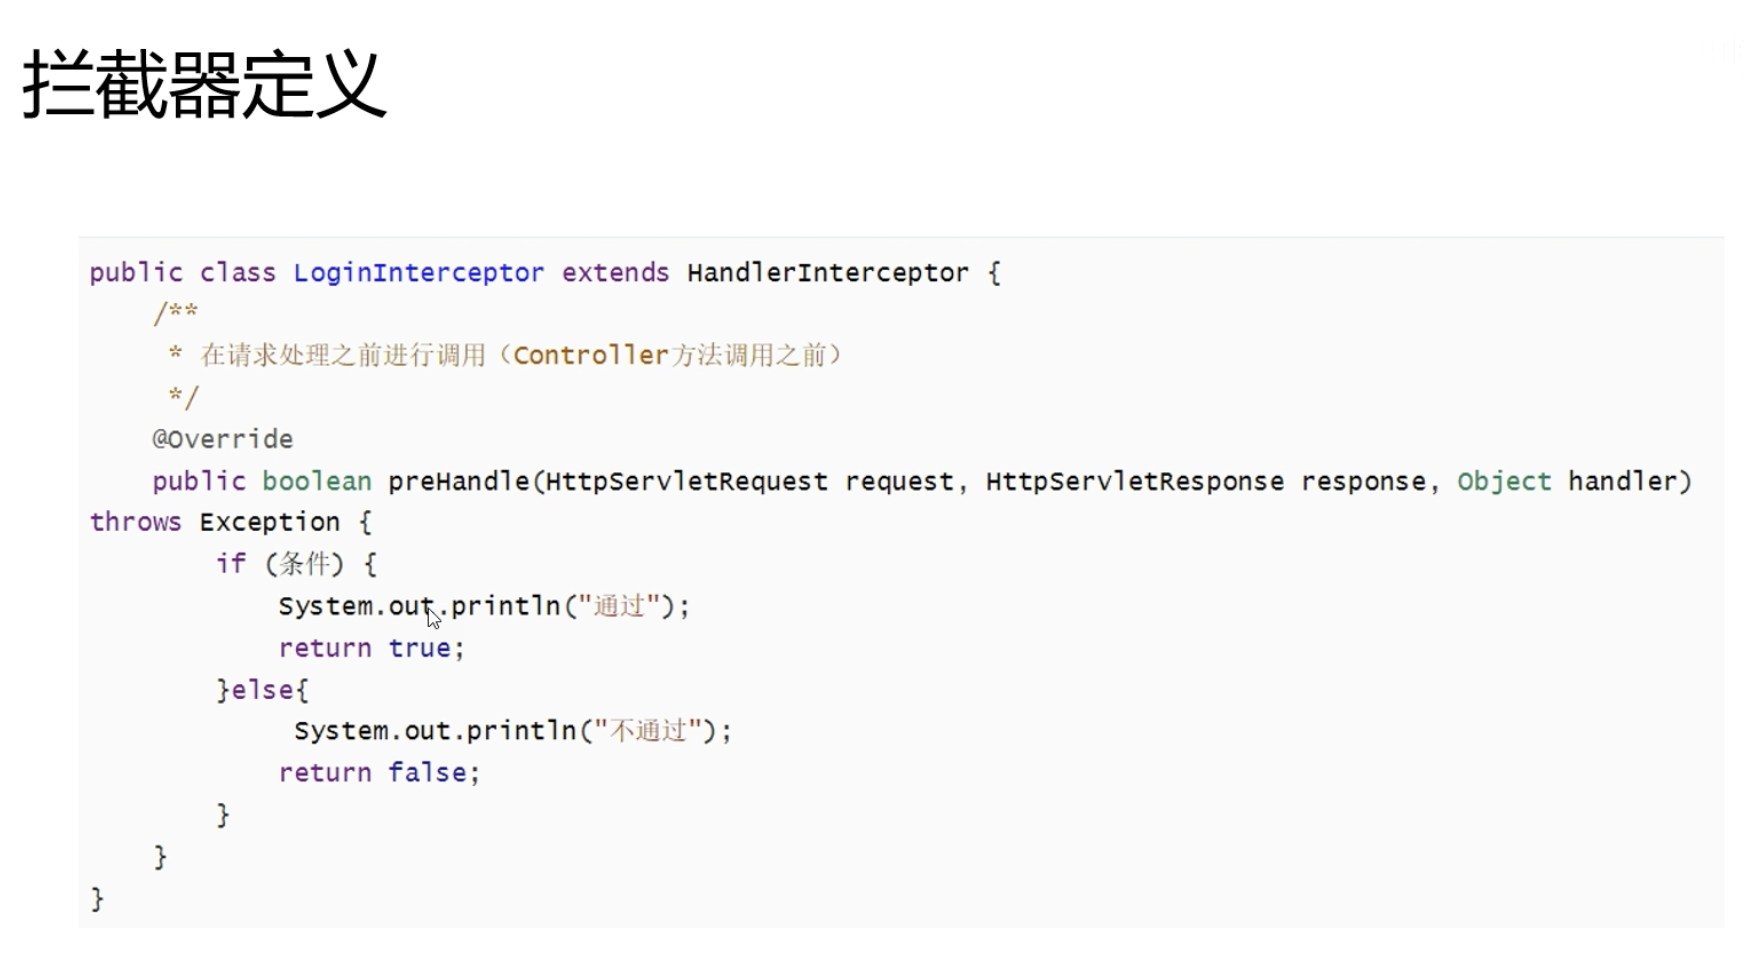
先定义一个普通的java类,一般以Interceptor结尾,代表是一个拦截器。需要继承系统的拦截器类,可以重写父类里的方法
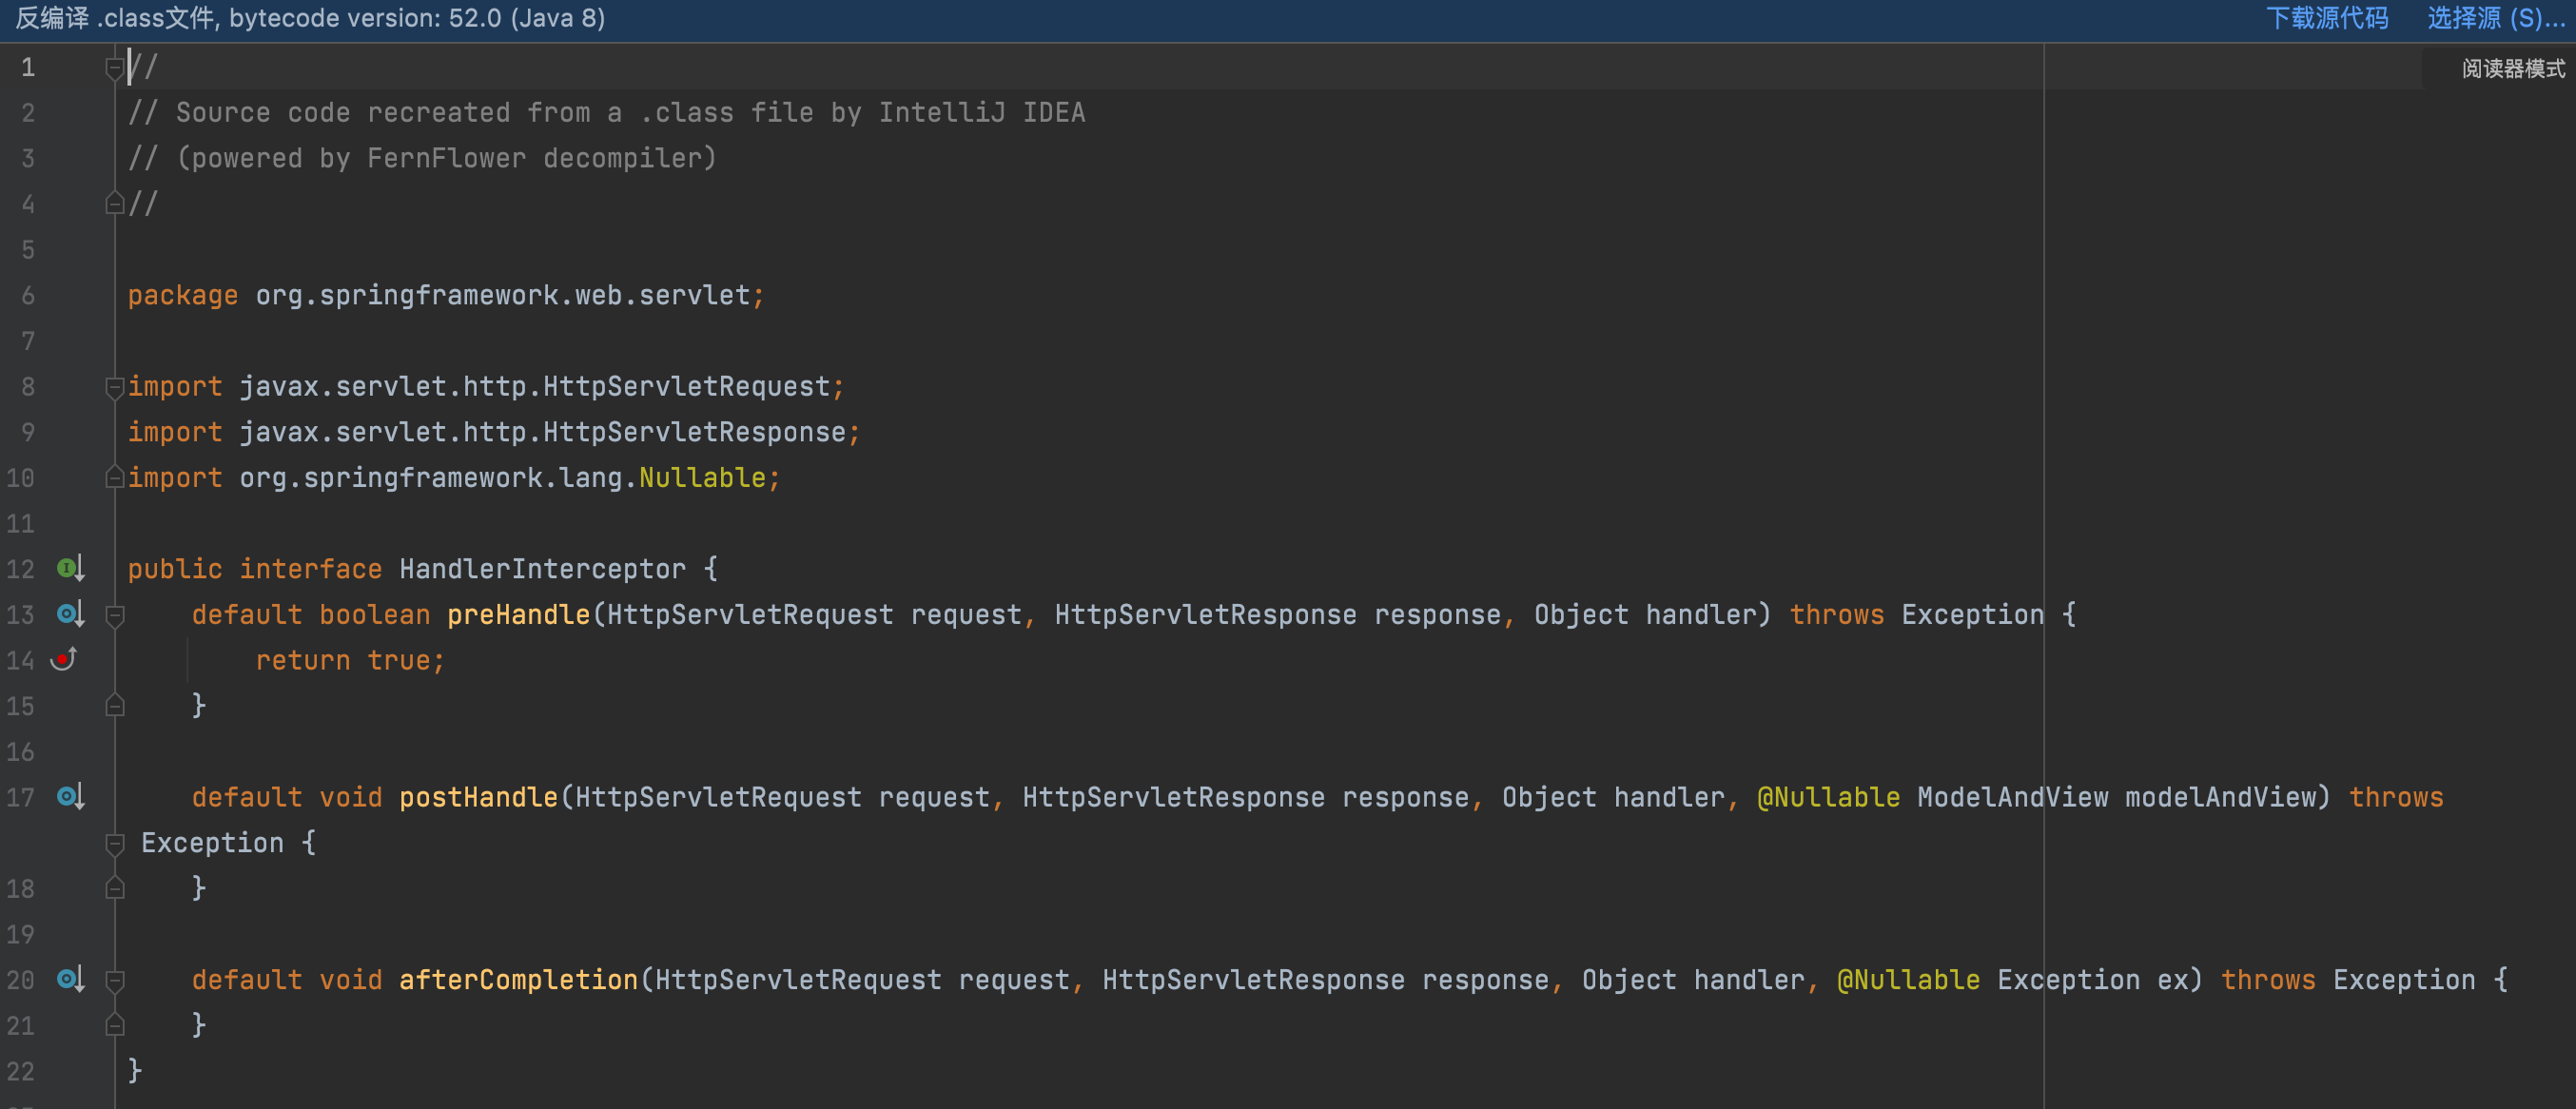
父类基本没做啥事,空的方法实现
下面重写其中的方法
src/main/java/com/example/helloworld/interceptor/LoginInterceptor.java
1
2
3
4
5
6
7
8
9
10
11
12
13
14
15
| package com.example.helloworld.interceptor;
import org.springframework.web.servlet.HandlerInterceptor;
import javax.servlet.http.HttpServletRequest;
import javax.servlet.http.HttpServletResponse;
public class LoginInterceptor implements HandlerInterceptor {
@Override
public boolean preHandle(HttpServletRequest request, HttpServletResponse response, Object handler) throws Exception {
System.out.println("LoginInterceptor拦截!!!");
return true;
}
}
|
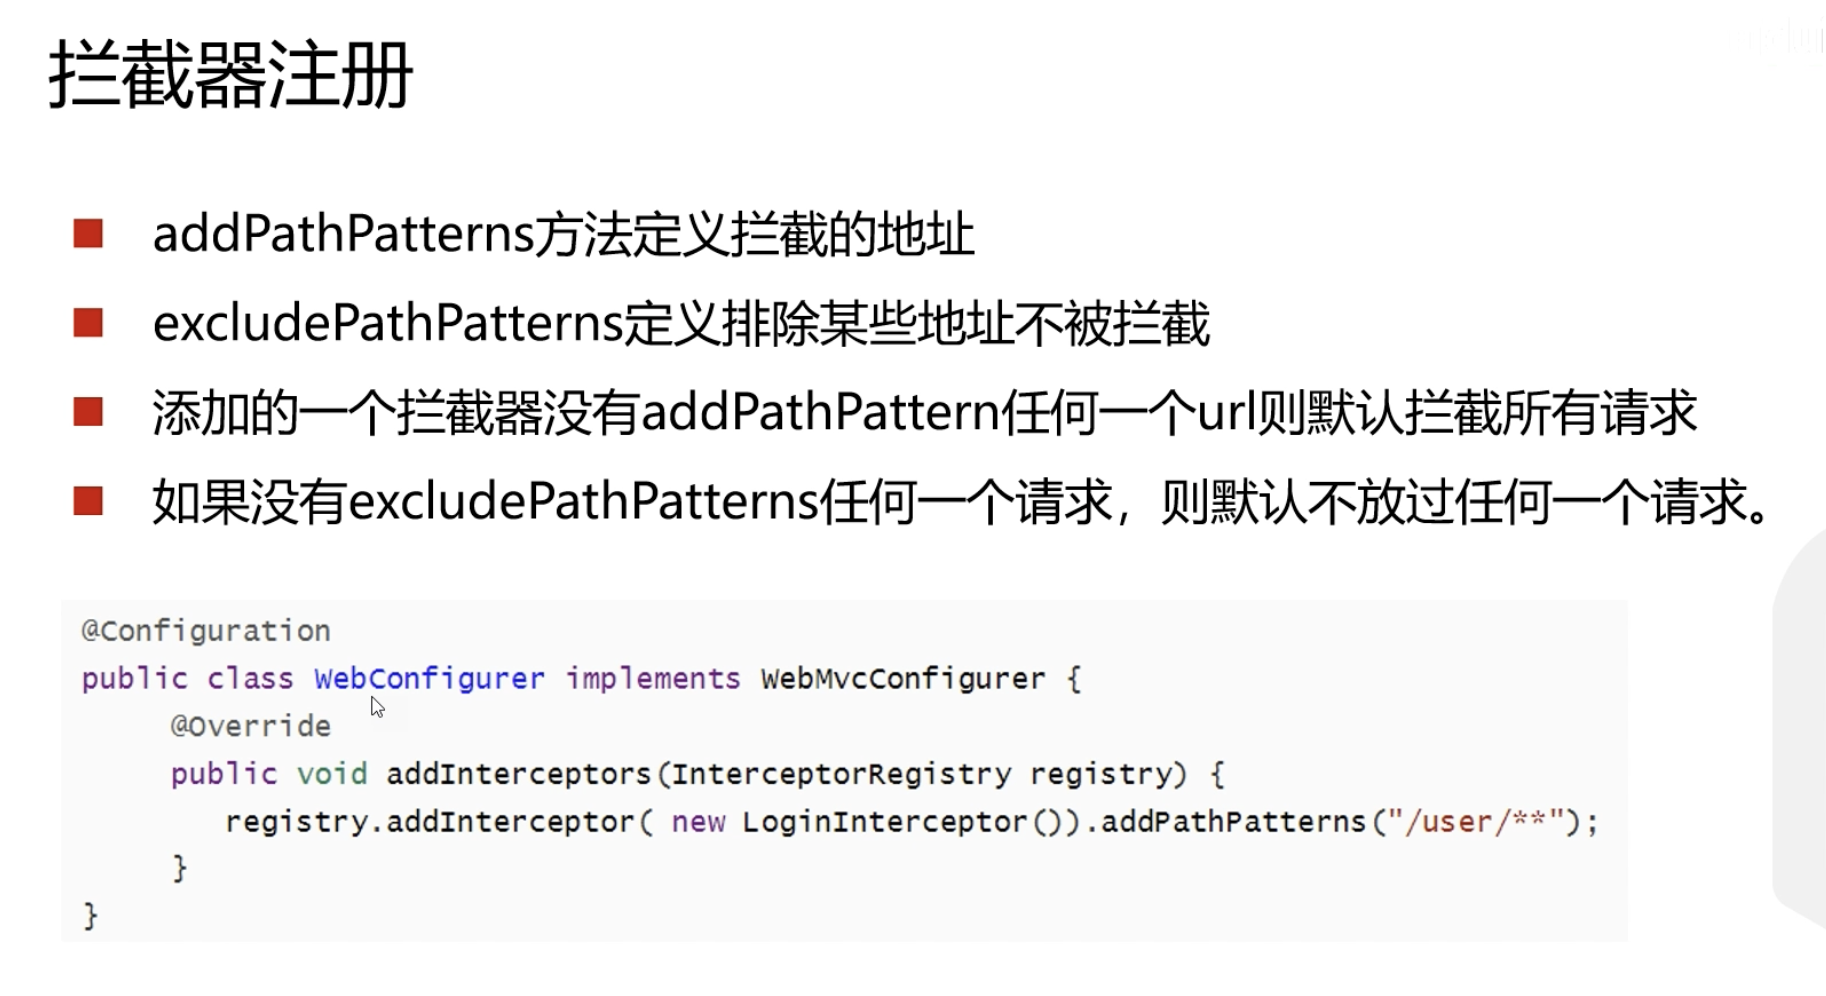
src/main/java/com/example/helloworld/config/WebConfig.java
配置只拦截/user
1
2
3
4
5
6
7
8
9
10
11
12
13
14
15
16
17
18
| package com.example.helloworld.config;
import com.example.helloworld.interceptor.LoginInterceptor;
import org.springframework.context.annotation.Configuration;
import org.springframework.web.servlet.config.annotation.InterceptorRegistry;
import org.springframework.web.servlet.config.annotation.ResourceHandlerRegistry;
import org.springframework.web.servlet.config.annotation.WebMvcConfigurer;
@Configuration
public class WebConfig implements WebMvcConfigurer {
@Override
public void addInterceptors(InterceptorRegistry registry) {
registry.addInterceptor(new LoginInterceptor()).addPathPatterns("/user/**");
}
}
|
5.构建RESTful服务.pptx
Spring Boot实现RESTful API
PUT和PATCH咋精确区分? …前几年用过PUT,而PATCH我印象里从来没用过。。
没啥太大意思,还有主张一律用POST的
src/main/java/com/example/helloworld/controller/UserController.java:
1
2
3
4
5
6
7
8
9
10
11
12
13
14
15
16
17
18
19
20
21
22
23
24
25
26
27
28
29
30
31
32
33
34
| package com.example.helloworld.controller;
import com.example.helloworld.entity.User;
import io.swagger.annotations.Api;
import io.swagger.annotations.ApiOperation;
import org.springframework.web.bind.annotation.*;
@RestController
public class UserController {
@ApiOperation("获取用户")
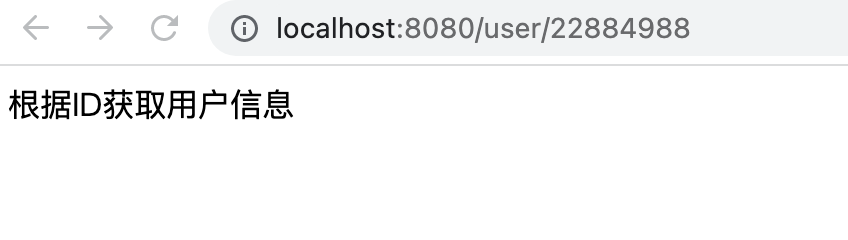
@GetMapping("/user/{id}")
public String getUserById(@PathVariable int id) {
System.out.println(id);
return "根据ID获取用户信息";
}
@PostMapping("/user")
public String save(User user) {
return "添加用户";
}
@PutMapping("/user")
public String update(User user) {
return "更新用户";
}
@DeleteMapping("/user/{id}")
public String deleteById(@PathVariable int id) {
System.out.println(id);
return "根据ID删除用户";
}
}
|

使用Swagger生成Web API文档
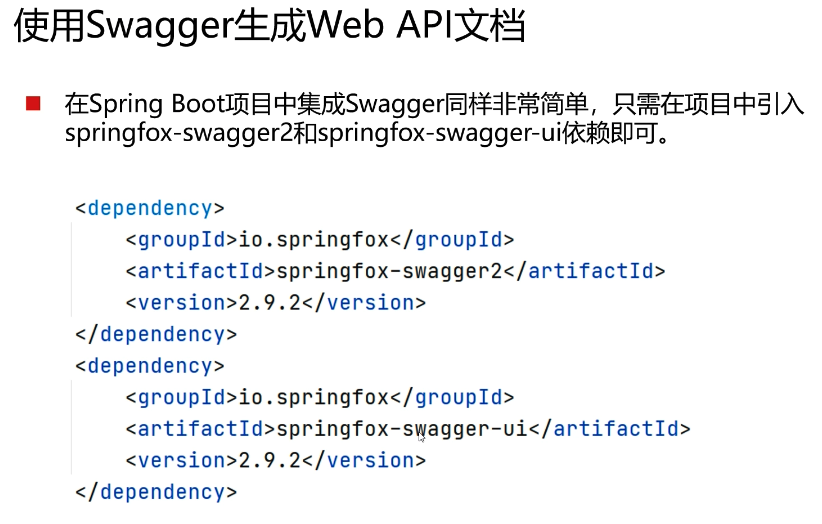
pom.xml:
1
2
3
4
5
6
7
8
9
10
11
12
|
<dependency>
<groupId>io.springfox</groupId>
<artifactId>springfox-swagger2</artifactId>
<version>2.9.2</version>
</dependency>
<dependency>
<groupId>io.springfox</groupId>
<artifactId>springfox-swagger-ui</artifactId>
<version>2.9.2</version>
</dependency>
|
除了添加依赖,还需要加一个配置类
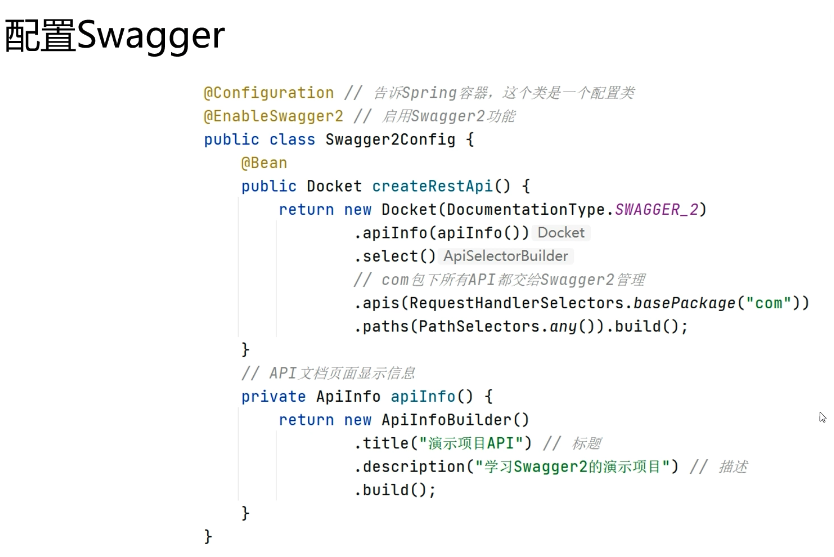
src/main/java/com/example/helloworld/config/SwaggerConfig.java:
1
2
3
4
5
6
7
8
9
10
11
12
13
14
15
16
17
18
19
20
21
22
23
24
25
26
27
28
29
30
31
32
33
34
35
36
37
38
| package com.example.helloworld.config;
import org.springframework.context.annotation.Bean;
import org.springframework.context.annotation.Configuration;
import springfox.documentation.builders.ApiInfoBuilder;
import springfox.documentation.builders.PathSelectors;
import springfox.documentation.builders.RequestHandlerSelectors;
import springfox.documentation.service.ApiInfo;
import springfox.documentation.spi.DocumentationType;
import springfox.documentation.spring.web.plugins.Docket;
import springfox.documentation.swagger2.annotations.EnableSwagger2;
@Configuration
@EnableSwagger2
public class SwaggerConfig {
@Bean
public Docket createRestApi() {
return new Docket(DocumentationType.SWAGGER_2)
.apiInfo(apiInfo())
.select()
.apis(RequestHandlerSelectors.basePackage("com"))
.paths(PathSelectors.any()).build();
}
private ApiInfo apiInfo() {
return new ApiInfoBuilder()
.title("爽哥提示:演示项目API")
.description("爽哥提示:演示项目")
.version("1.0")
.build();
}
}
|
可以访问http://localhost:8080/swagger-ui.html
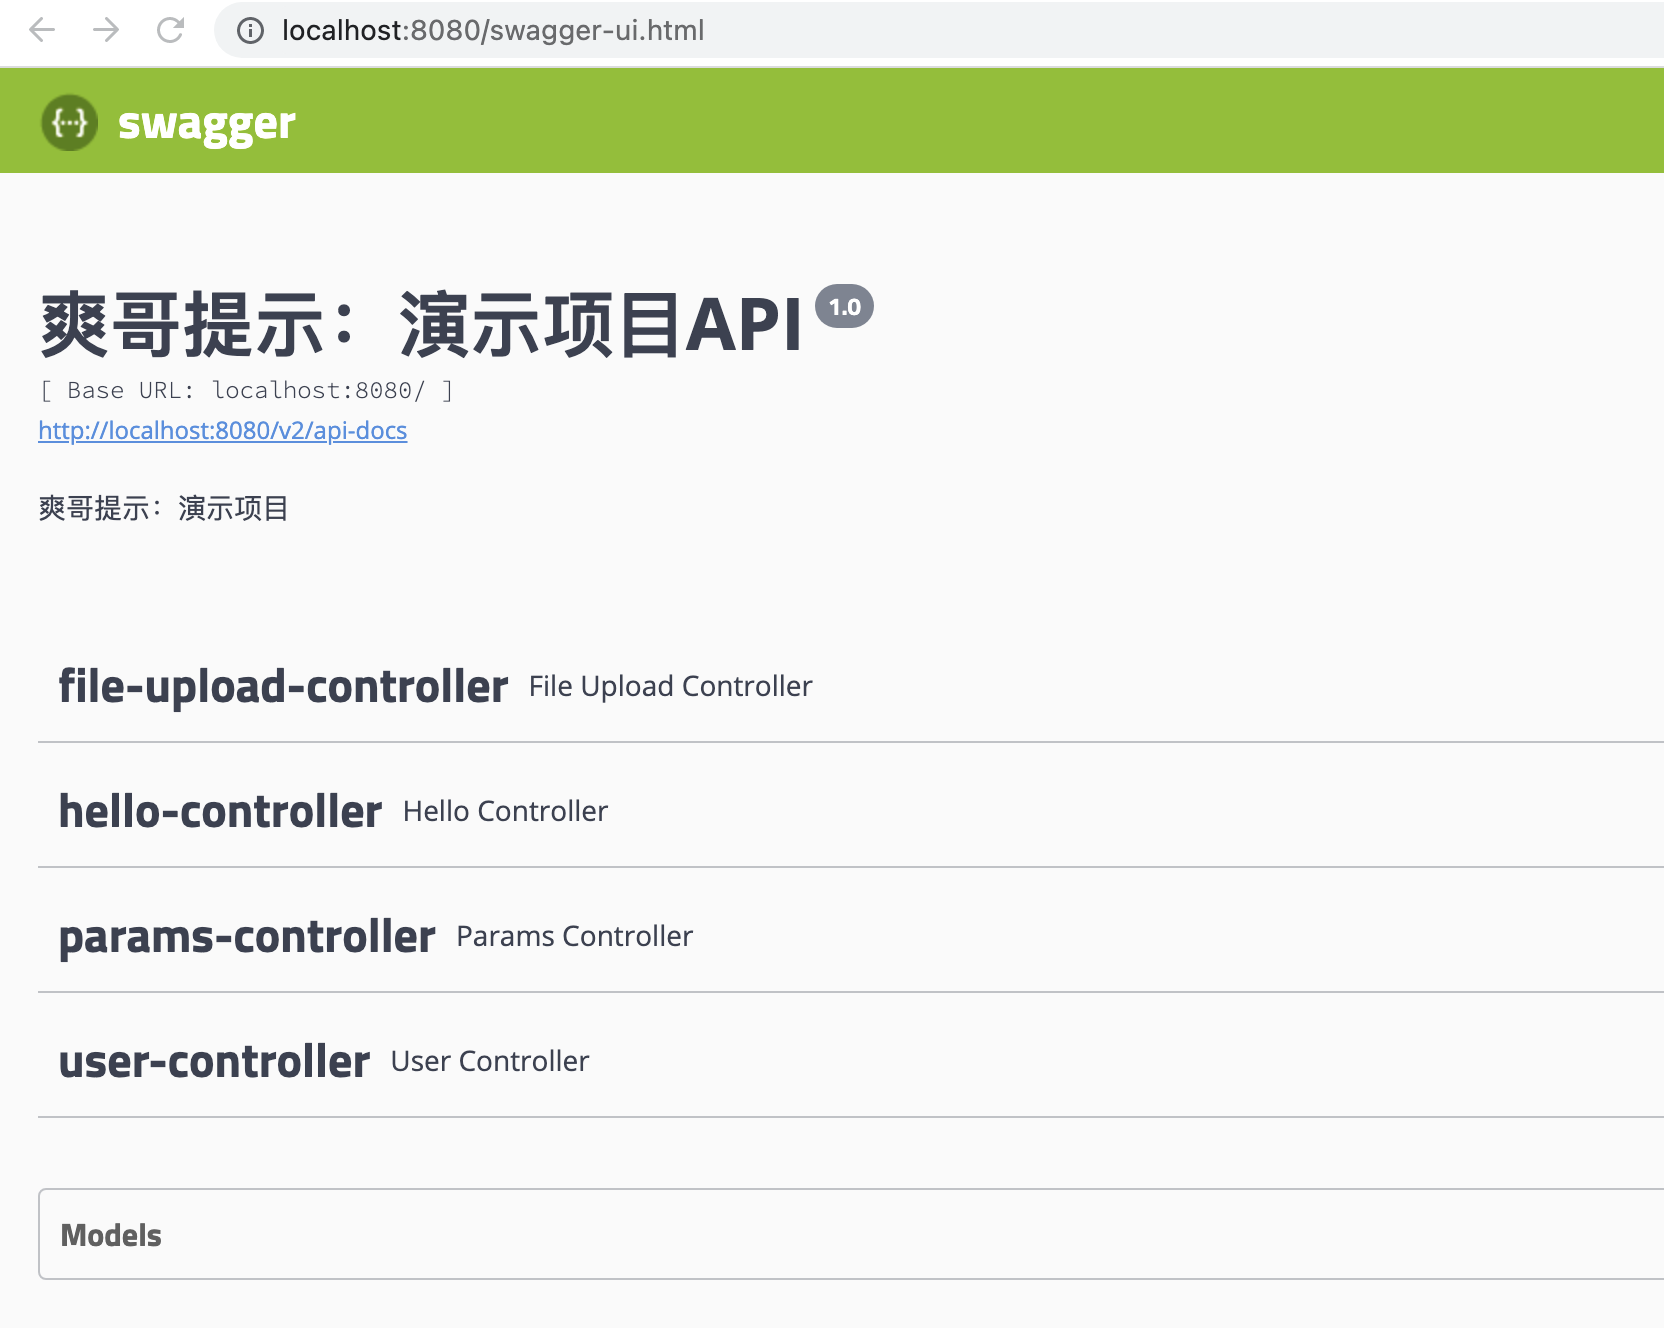
读的项目里的控制器,展开可以看到每个控制器里都有什么方法
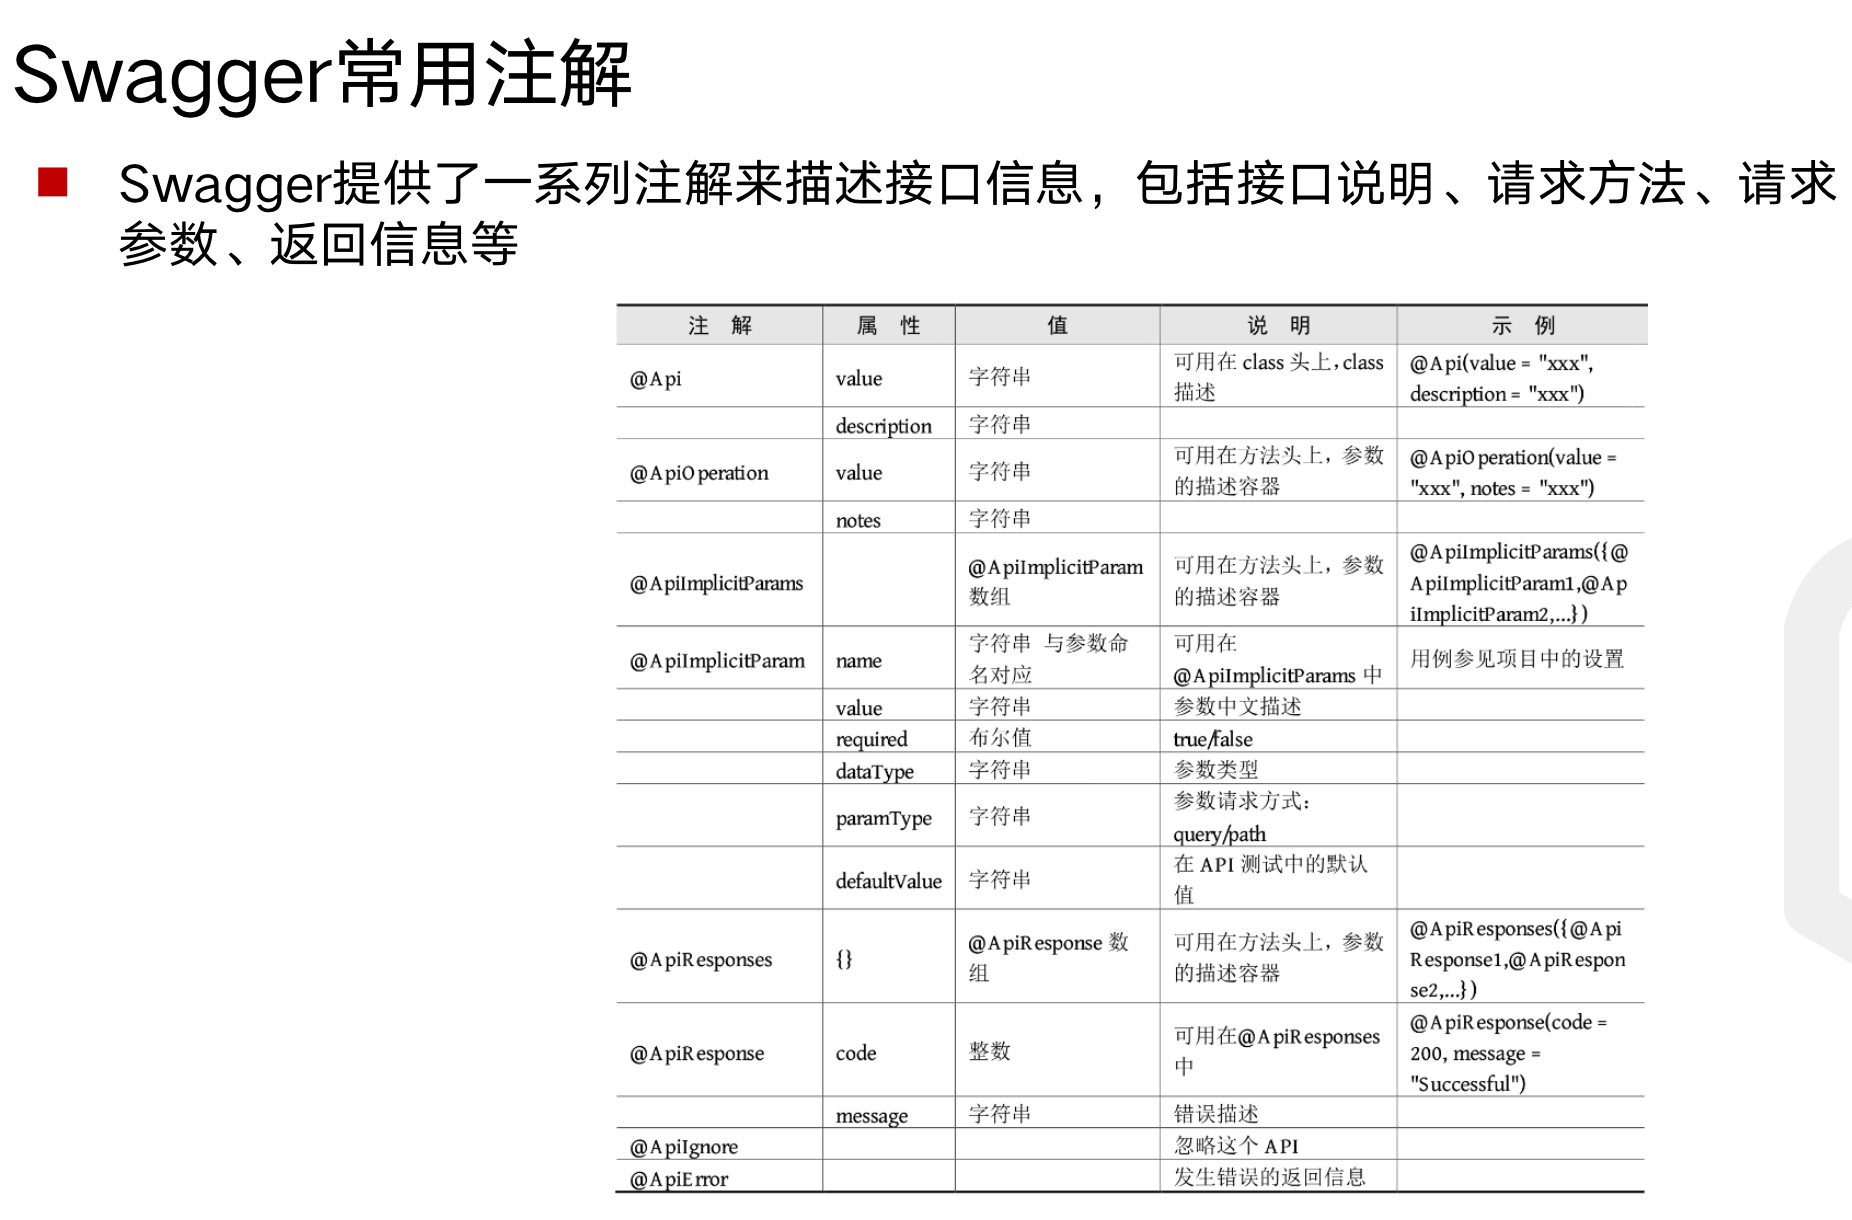
可以通过如下注解,在页面添加注释
例如@ApiOperation(“获取用户”)
还可以在页面直接进行调试

原文链接: https://dashen.tech/2021/11/12/SpringBoot进阶使用/
版权声明: 转载请注明出处.