https://chainmyway.com/cex_monitor_notify/00-%E5%89%8D%E8%A8%80
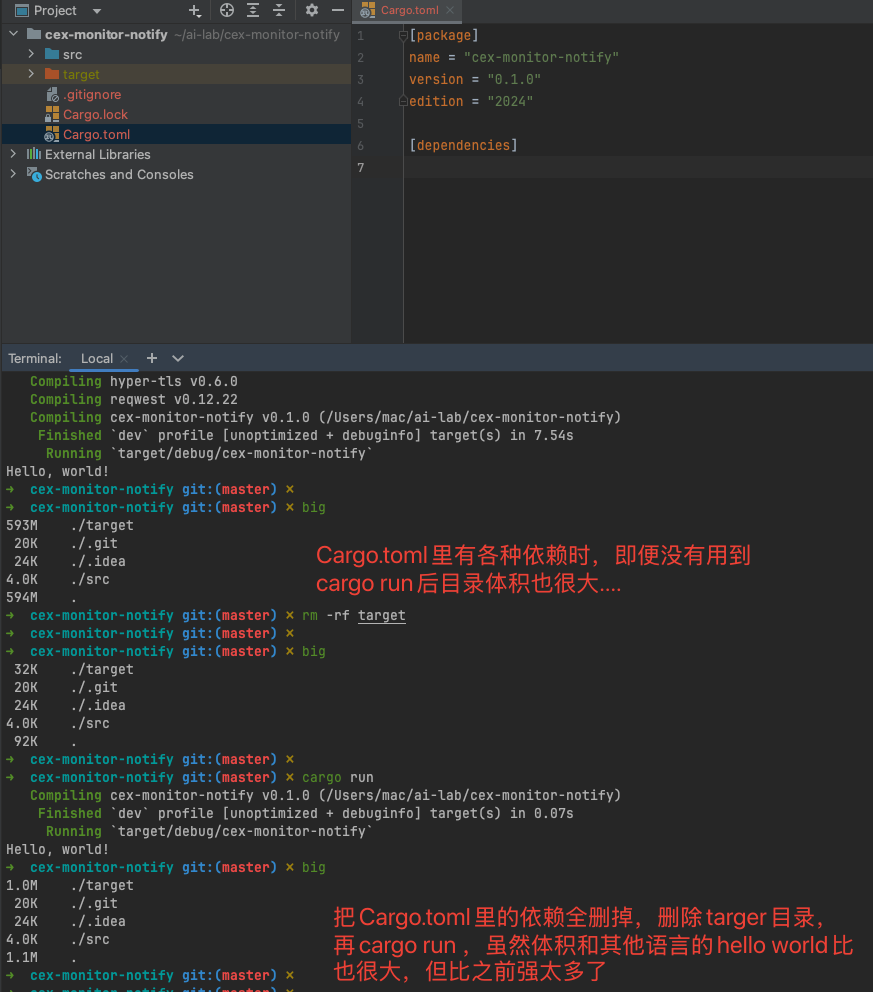
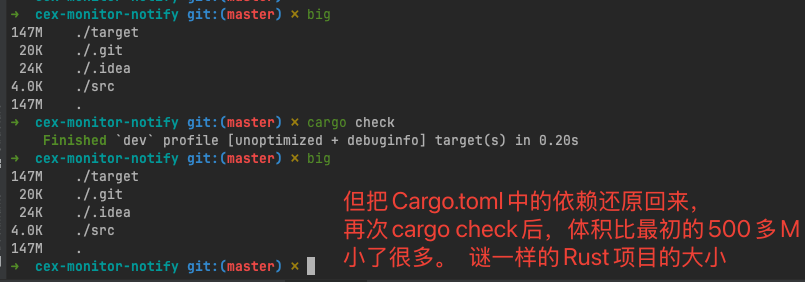
Rust 这个体积…
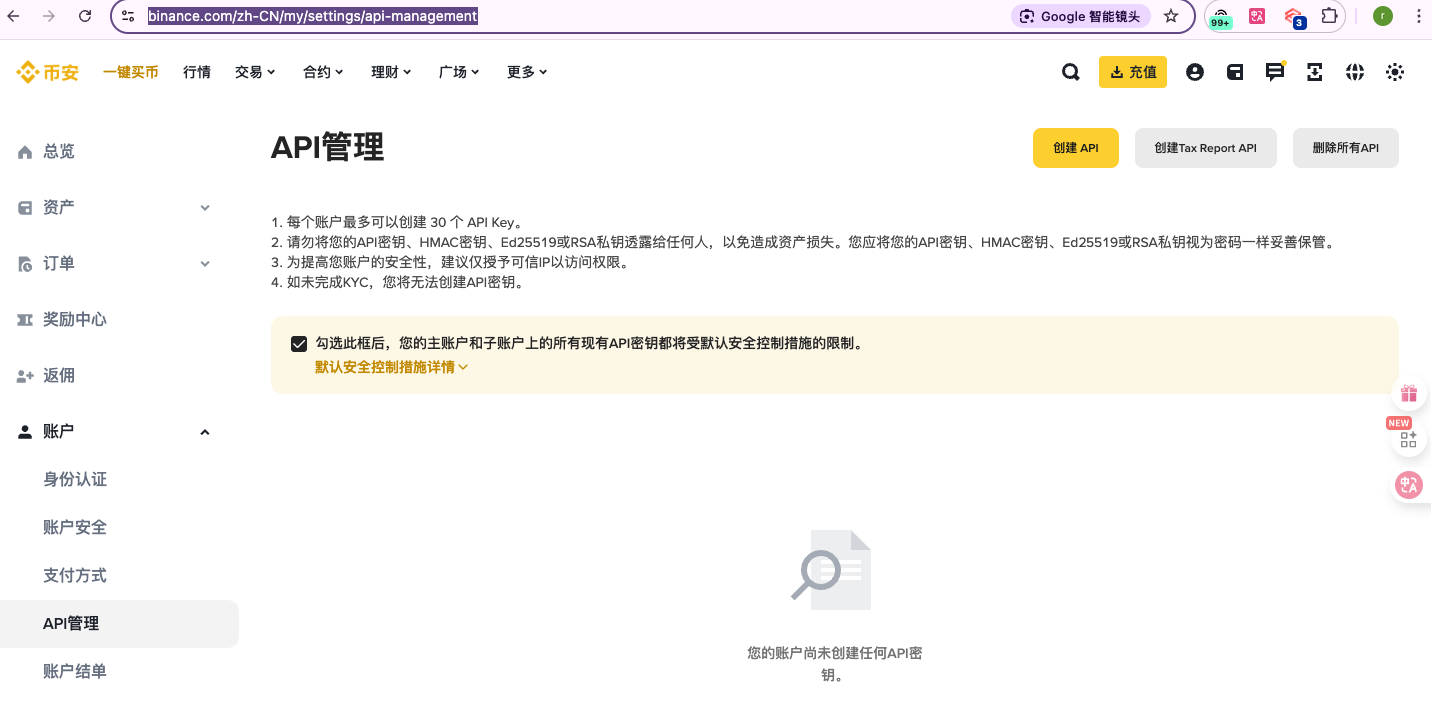
我用quiterace@gmail.com 这个邮箱新注册了一个币安 quiterace uid 1139585560
币安 API管理: https://www.binance.com/zh-CN/my/settings/api-management
md还必须得完成中级认证才能用
上大号…一定得注意资金安全..
string类型的时间戳 1753790400000 如何转为 北京时间2025-07-29 20:00:00? 在 Rust 中,你可以使用 chrono 库来进行时间戳转换。这里提供完整的解决方案:## Cargo.toml 依赖:
1
2
3
[dependencies] chrono = { version = "0.4" , features = ["serde" ] }chrono-tz = "0.8"
使用说明:
时间戳格式 :1753790400000 是13位毫秒级时间戳转换步骤 :
字符串转数字
毫秒转秒(除以1000)
创建UTC时间
转换为北京时间(+8时区)
格式化输出
运行结果: 1 2 时间戳: 1753790400000 北京时间: 2025-07-29 20:00:00
其他常用格式: 1 2 3 4 5 6 7 beijing_datetime.format("%Y-%m-%d %H:%M:%S %A" ).to_string () beijing_datetime.format("%Y-%m-%dT%H:%M:%S%z" ).to_string ()
这个解决方案可以准确地将毫秒级时间戳转换为北京时间,并且包含了错误处理。
1 2 3 4 5 6 7 8 9 10 11 12 13 14 15 16 17 18 19 20 21 22 23 24 25 26 27 28 29 30 31 32 33 34 35 36 37 38 39 40 41 42 43 44 45 46 47 48 49 50 51 52 53 54 55 56 57 58 59 60 61 use chrono::{DateTime, TimeZone, Utc};use chrono_tz::Asia::Shanghai;fn timestamp_to_beijing_time (timestamp_str: &str ) -> Result <String , Box <dyn std::error::Error>> { let timestamp_ms : i64 = timestamp_str.parse ()?; let timestamp_sec = timestamp_ms / 1000 ; let nanosec = ((timestamp_ms % 1000 ) * 1_000_000 ) as u32 ; let utc_datetime = DateTime::from_timestamp (timestamp_sec, nanosec) .ok_or ("Invalid timestamp" )?; let beijing_datetime = utc_datetime.with_timezone (&Shanghai); Ok (beijing_datetime.format("%Y-%m-%d %H:%M:%S" ).to_string ()) } fn main () -> Result <(), Box <dyn std::error::Error>> { let timestamp = "1753790400000" ; match timestamp_to_beijing_time (timestamp) { Ok (beijing_time) => { println! ("时间戳: {}" , timestamp); println! ("北京时间: {}" , beijing_time); } Err (e) => { eprintln! ("转换失败: {}" , e); } } let timestamps = vec! [ "1753790400000" , "1609459200000" , "1640995200000" , ]; println! ("\n批量转换:" ); for ts in timestamps { if let Ok (beijing_time) = timestamp_to_beijing_time (ts) { println! ("{} -> {}" , ts, beijing_time); } } Ok (()) } fn quick_convert (timestamp_str: &str ) -> String { timestamp_str .parse::<i64 >() .ok () .and_then (|ms| DateTime::from_timestamp (ms / 1000 , ((ms % 1000 ) * 1_000_000 ) as u32 )) .map (|utc| utc.with_timezone (&Shanghai).format("%Y-%m-%d %H:%M:%S" ).to_string ()) .unwrap_or_else (|| "转换失败" .to_string ()) }
rust中and_then什么作用? and_then 是 Rust 中 Option 和 Result 类型的一个重要方法,用于链式操作 和错误传播 。
基本概念 and_then 的作用是:当前值为 Some/Ok 时,执行传入的闭包;否则直接返回 None/Err ## 核心要点:
1. 函数签名 1 2 3 4 5 6 7 fn and_then <U, F>(self , f: F) -> Option <U> where F: FnOnce (T) -> Option <U>fn and_then <U, F>(self , f: F) -> Result <U, E>where F: FnOnce (T) -> Result <U, E>
2. 与 map 的区别
map: 函数返回 T,自动包装成 Option<T>/Result<T, E>and_then: 函数必须返回 Option<T>/Result<T, E>,可以返回 None/Err
3. 使用场景
链式操作 :多个可能失败的操作串联条件过滤 :在链式操作中进行条件判断错误传播 :任何一步失败,整个链条短路扁平化 :避免嵌套的 Option<Option<T>> 或 Result<Result<T, E>, E>
4. 回到你的代码 1 2 3 4 5 timestamp_str .parse::<i64 >() .ok () .and_then (|ms| DateTime::from_timestamp (...)) .map (|utc| utc.with_timezone (&Shanghai)...)
这里 and_then 的作用是:只有当解析成功时,才尝试创建 DateTime 对象 。
1 2 3 4 5 6 7 8 9 10 11 12 13 14 15 16 17 18 19 20 21 22 23 24 25 26 27 28 29 30 31 32 33 34 35 36 37 38 39 40 41 42 43 44 45 46 47 48 49 50 51 52 53 54 55 56 57 58 59 60 61 62 63 64 65 66 67 68 69 70 71 72 73 74 75 76 77 78 79 80 81 82 83 84 85 86 87 88 89 90 91 92 93 94 95 96 97 98 99 100 101 102 103 104 105 106 107 108 109 110 111 112 113 114 115 116 117 118 119 120 121 122 123 124 125 126 127 128 129 130 131 132 133 134 135 136 137 138 139 140 141 142 143 144 145 146 147 148 149 150 151 152 153 154 155 156 157 158 159 160 161 162 163 164 165 166 167 168 169 170 171 172 fn example_option_and_then () { println! ("=== Option and_then 示例 ===" ); let result = Some (5 ) .and_then (|x| { println! ("处理值: {}" , x); if x > 0 { Some (x * 2 ) } else { None } }) .and_then (|x| { println! ("再次处理: {}" , x); Some (x + 1 ) }); println! ("最终结果: {:?}" , result); let result2 = Some (-5 ) .and_then (|x| { println! ("处理负数: {}" , x); if x > 0 { Some (x * 2 ) } else { None } }) .and_then (|x| { println! ("这里不会执行" ); Some (x + 1 ) }); println! ("负数结果: {:?}" , result2); } fn divide (a: i32 , b: i32 ) -> Result <i32 , String > { if b == 0 { Err ("除数不能为零" .to_string ()) } else { Ok (a / b) } } fn sqrt (x: i32 ) -> Result <f64 , String > { if x < 0 { Err ("不能对负数开方" .to_string ()) } else { Ok ((x as f64 ).sqrt ()) } } fn example_result_and_then () { println! ("\n=== Result and_then 示例 ===" ); let result = divide (20 , 4 ) .and_then (|x| { println! ("除法结果: {}" , x); sqrt (x) }); println! ("最终结果: {:?}" , result); let result2 = divide (20 , 0 ) .and_then (|x| { println! ("这里不会执行" ); sqrt (x) }); println! ("失败结果: {:?}" , result2); } fn compare_and_then_with_map () { println! ("\n=== and_then vs map 对比 ===" ); let value = Some (5 ); let map_result = value.map (|x| x * 2 ); println! ("map 结果: {:?}" , map_result); let and_then_result = value.and_then (|x| Some (x * 2 )); println! ("and_then 结果: {:?}" , and_then_result); let filtered = value.and_then (|x| { if x > 10 { Some (x) } else { None } }); println! ("过滤结果: {:?}" , filtered); } #[derive(Debug)] struct User { id: u32 , name: String , age: u32 , } fn find_user_by_id (id: u32 ) -> Option <User> { match id { 1 => Some (User { id: 1 , name: "张三" .to_string (), age: 25 }), 2 => Some (User { id: 2 , name: "李四" .to_string (), age: 17 }), _ => None , } } fn check_adult (user: User) -> Option <User> { if user.age >= 18 { Some (user) } else { None } } fn get_user_permissions (user: User) -> Option <Vec <String >> { Some (vec! ["read" .to_string (), "write" .to_string ()]) } fn example_real_world () { println! ("\n=== 实际应用场景 ===" ); let result = Some (1 ) .and_then (find_user_by_id) .and_then (check_adult) .and_then (get_user_permissions); println! ("用户1权限: {:?}" , result); let result2 = Some (2 ) .and_then (find_user_by_id) .and_then (check_adult) .and_then (get_user_permissions); println! ("用户2权限: {:?}" , result2); } fn parse_and_validate () { println! ("\n=== 字符串处理示例 ===" ); let input = "123" ; let result = Some (input) .and_then (|s| s.parse::<i32 >().ok ()) .and_then (|n| { if n > 0 && n < 1000 { Some (n) } else { None } }) .and_then (|n| Some (format! ("验证通过的数字: {}" , n))); println! ("处理结果: {:?}" , result); } fn main () { example_option_and_then (); example_result_and_then (); compare_and_then_with_map (); example_real_world (); parse_and_validate (); }
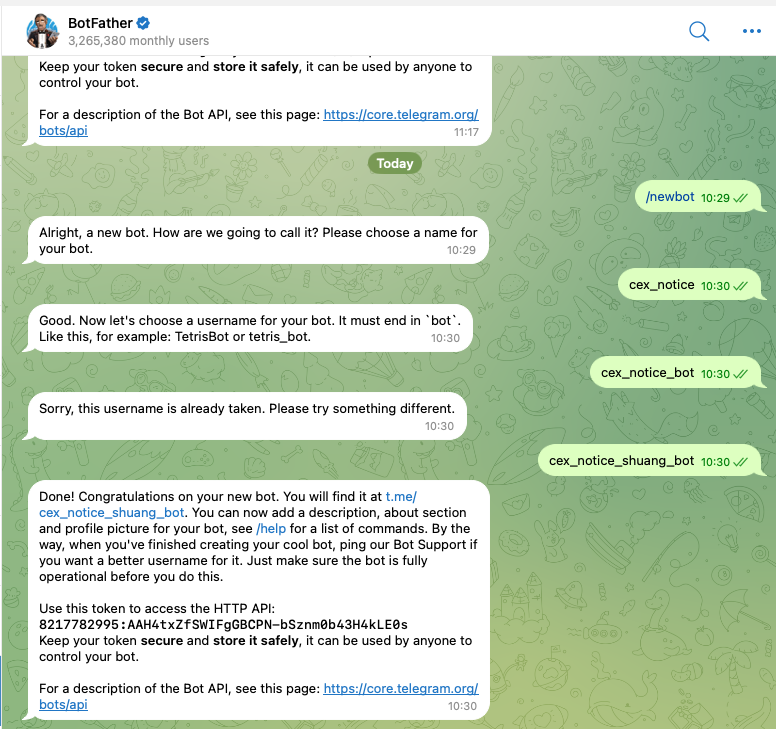
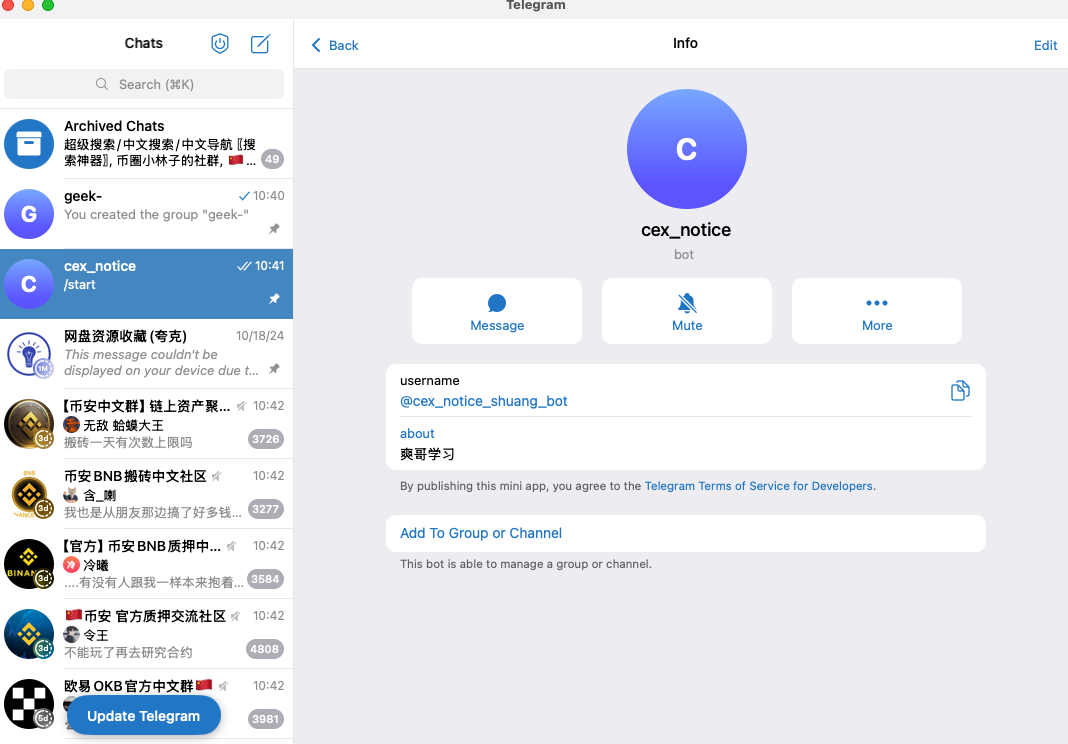
1 2 3 4 5 6 7 Done! Congratulations on your new bot. You will find it at t.me/cex_notice_shuang_bot. You can now add a description, about section and profile picture for your bot, see /help for a list of commands. By the way, when you've finished creating your cool bot, ping our Bot Support if you want a better username for it. Just make sure the bot is fully operational before you do this. Use this token to access the HTTP API: 8217782995:AAH4txZfSWIFgGBCPN-bSznm0b43H4kLE0s Keep your token secure and store it safely, it can be used by anyone to control your bot. For a description of the Bot API, see this page: https://core.telegram.org/bots/api
t.me/cex_notice_shuang_bot
Use this token to access the HTTP API:
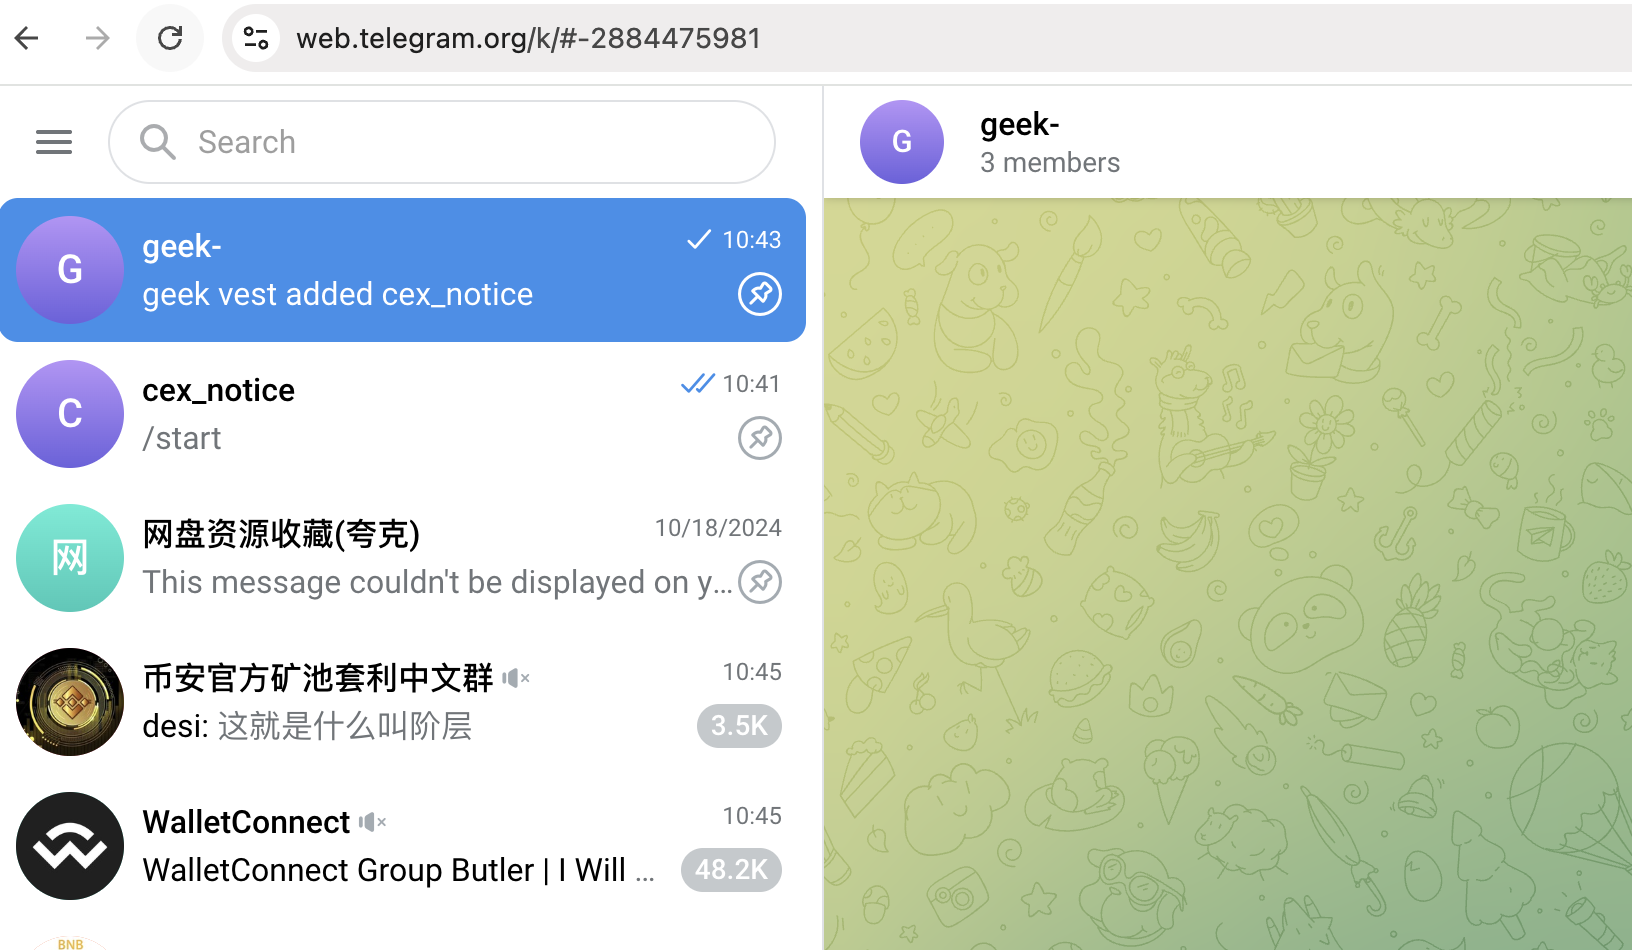
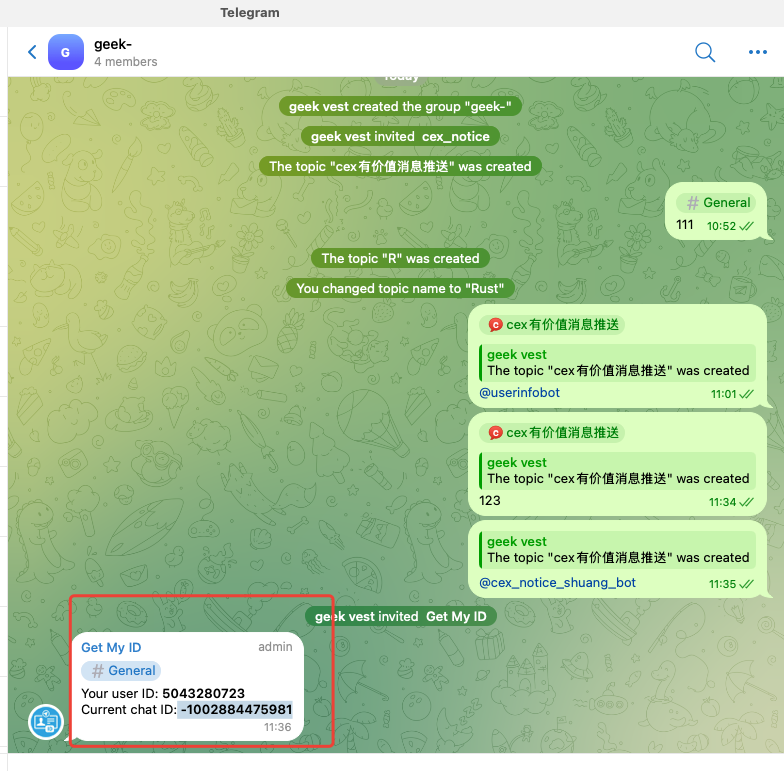
新建一个群组
-2884475981
https://web.telegram.org/k/#-2884475981
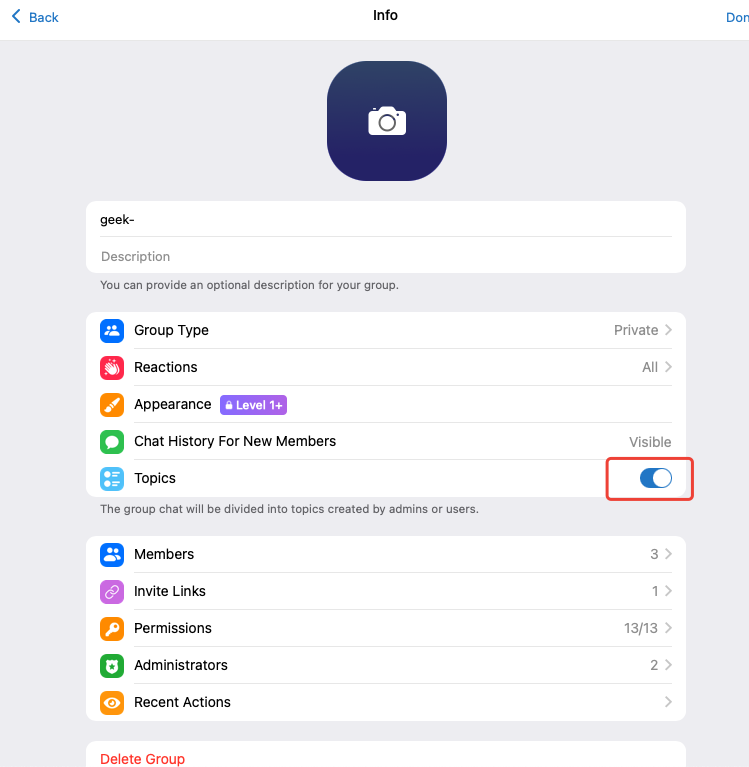
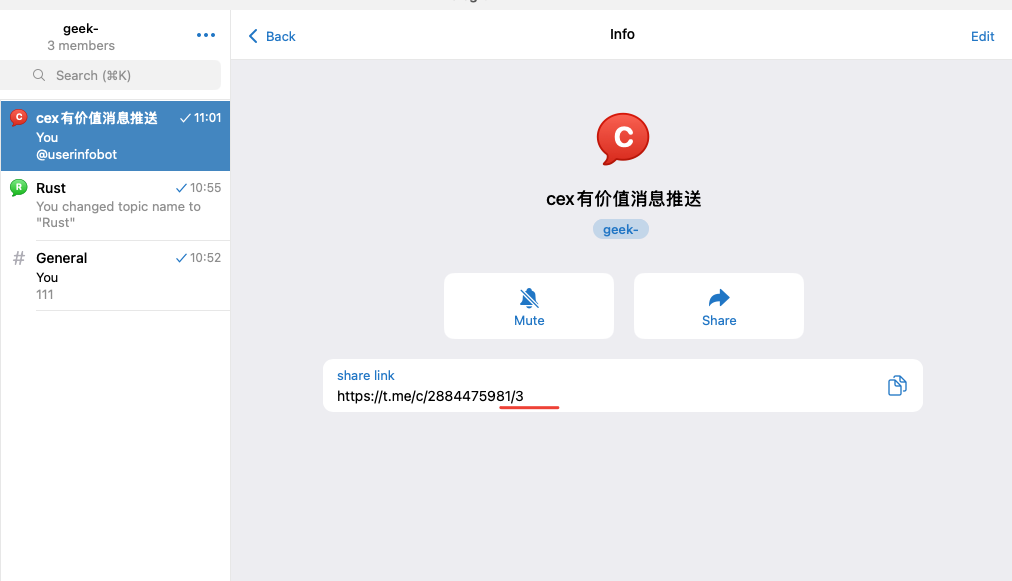
Golang 实现 Telegram Bot 发送消息到指定话题(Topic)
报错:
{“ok”:false,”error_code”:400,”description”:”Bad Request: chat not found”}
是因为通过上面这种方式获取到的群组ID是不对的…
参考 https://community.activepieces.com/t/solved-telegram-help-post-to-channel-chat-not-found-suggestion-for-the-pieces-description/1148
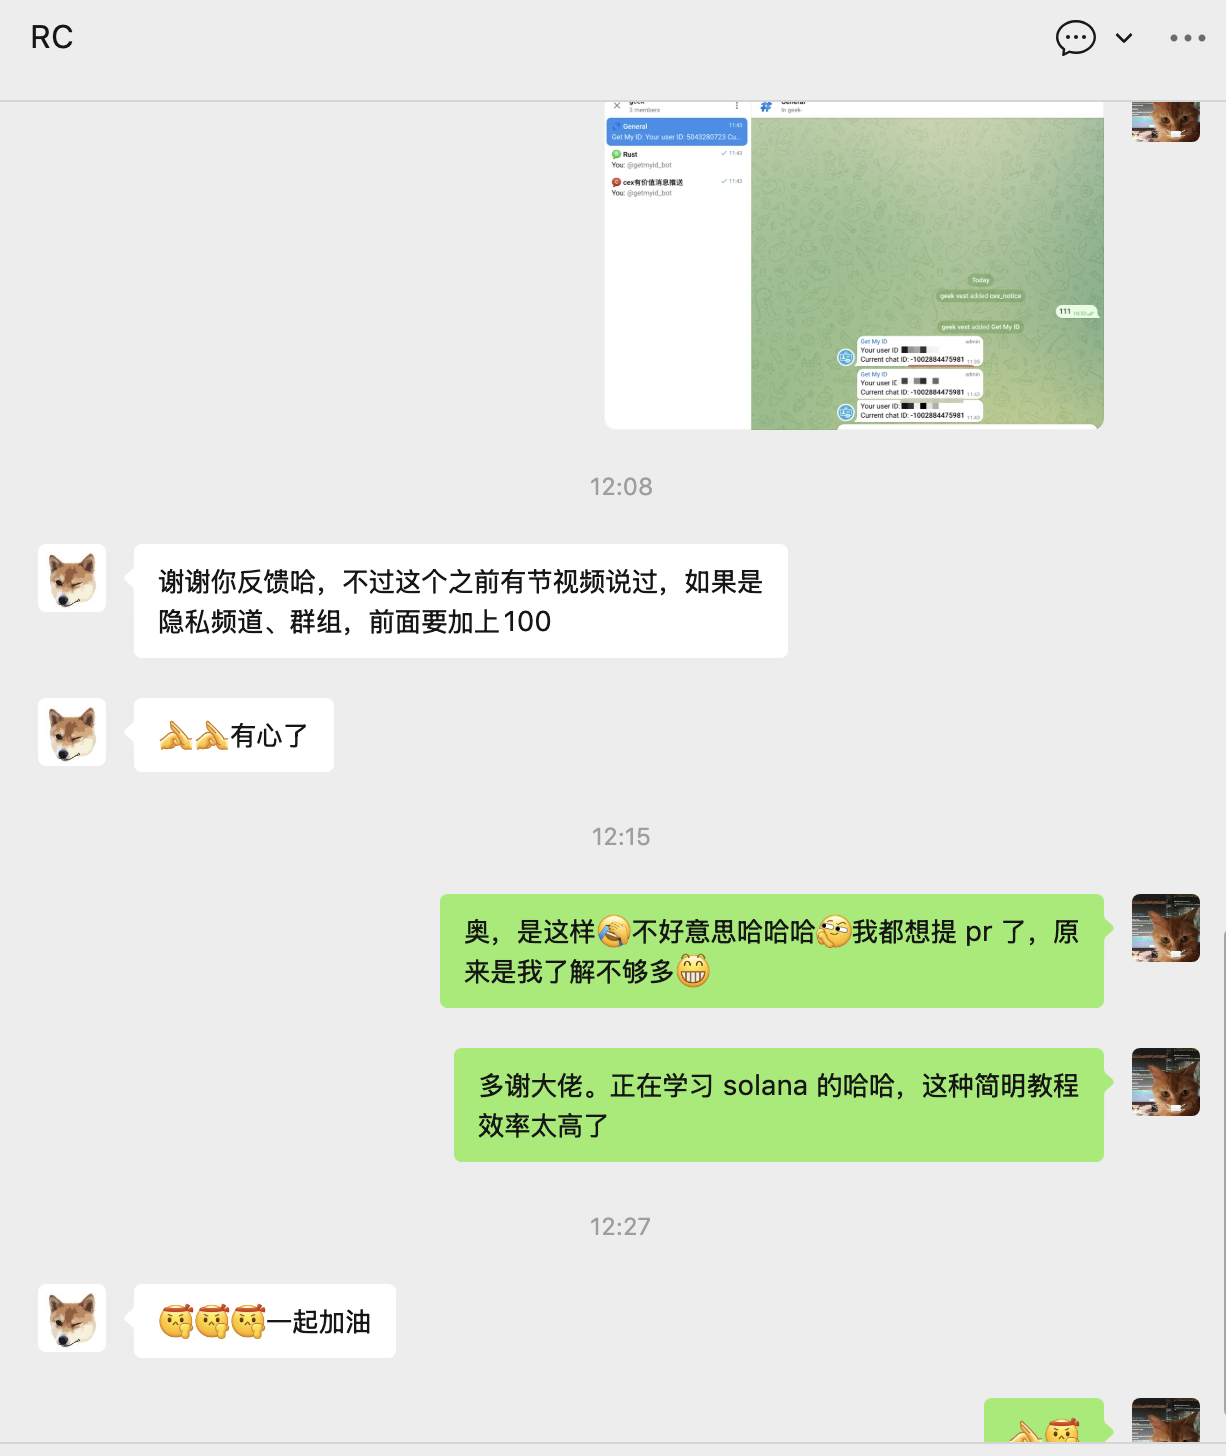
搜索 @getmyid_bot 并邀请进群组,然后@他,这样能拿到群组真实的ID
Your user ID: 5043280723
原文链接: https://dashen.tech/2025/08/06/Rust实战之主流CEX监控机器人/
版权声明: 转载请注明出处.